
JetSki Solutions - Installation Instructions >
JetSki Solutions Type 4, 8, 9 coupler kit and stinger resizing kit installation instructions
1. Disconnect and remove battery for safety.
2. If manifold is installed on engine, remove it.
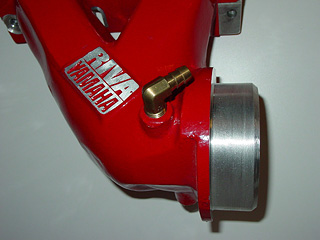
3. Remove the barb part of the manifold end using a 1� belt sander, rotary tool, and large 14� bastard file. A picture of a manifold with the barb removed is shown on the website. If unsure of this procedure, call for more info and additional photos. This step may seem crazy, but this modification is proven to not only roughly triple the life of the coupler, but enable you to properly align the pipe and lord mounts AND make installation much easier.
4. Finish the barb removal by putting a nice 45-degree chamfer on the end of the manifold. We also suggest drilling and tapping the blank boss for an additional cooling fitting. (3/8 NPT)
5. Reinstall the manifold with a new gasket. Use a small amount of red 271 Loctite on all bolts.
6. Now temporarily install pipe without coupling or O-rings and check that the pipe is in proper alignment with the manifold. We have found most pipes to be off quite a bit. Fabricating and bolting an additional larger head Lord mount plate may be required if the holes need to be moved closer to the edge of the plate. If the holes need to be moved closer to the pipe chamber then no plate will be required.
7. Remove pipe and pack a small amount of clay around the �mouth� of the manifold, where the pipes inner ring would seat. Again without O rings. Remove and note if the inner aluminum tube is actually touching the manifold (good), or falling short (bad). A gap here allows hot gasses to easily impinge upon the coupler causing early failure due to localized overheating and burning. If the inner ring is too long (but touching) and causes a gap between the manifold and pipe (where the O ring would be) of more than 1/16 inch, shorten the inner tube so the outer parts just barely meet. If the inner ring is falling short, then shorten the length of the manifold end accordingly (the part you removed the barb from). Ensuring both inner and outer fits are tight goes a long way to protect the coupler from excess heat.
8. If you have also purchased the stinger enlargement piece, install it now. This is fairly straightforward. The best placement is where the additional length is set to fall about � inch into the beginning of the 45-degree hose turn. Once you have determined the position where it will be installed, roughen and clean the inside of the tube and pipe end and set in place with JB weld. (Not JB Weld quick). Allow this to set, then drill and counter sink holes for the two flathead machine screws. Install the nuts with 271 Loctite and grind excess thread off. Placement is not crucial, but be sure to drill into the single wall area only. You should also check that the stinger water fitting is drilled through. We have found some pipes NOT drilled through at all, or not drilled all the way.
9. Do another dry run installation (with coupler, but no band clamps) to get used to the stinger piece. It is very helpful the lube the stinger end or hose with spit or Windex. The larger diameter makes pushing the end into the hose a bit tougher, but not having to force the coupler over the large barb MORE than makes up for this. If you notice the coupler seems too long, and is preventing the pipe from coming up snug (or very close) to the manifold, then use a razor blade to trim some off. We have to do this on most installs.
10. Now that you have properly aligned and �dry run installed� the pipe, you are ready for final install. We do not use the O rings, instead, we fit the coupler to the pipe, then fill the groove with Ultra Copper automotive silicone. This is the highest temp silicone we know of. Fill the groove generously, then drop the T bolt band clamp over the coupler and lower the pipe in place and install. Don�t forget to install the two stinger clamps over the hose first!!!
11. The only down side to this conversion is removal within a few months. Depending on how often you ride, it may be required to cut the coupler to remove the pipe. If you ride often (like two tanks a week or so) the silicone seal is usually mostly broken loose within a few months, and removal at that point is fairly easy without cutting the coupler. You may try applying grease to the manifold end to prevent the silicone from adhering if you need to pull the pipe often. Bottom line is the O-rings never worked, no matter how well aligned the pipe was, and were always found burnt up and disintegrated every time we removed the pipe.
Please contact us with questions or for assistance.
